JICO Factory Visit
Author: Brian Date Posted:2 November 2017
Last month I was fortunate to be invited to the Nippon Precision Jewel Industry (JICO) company's factory for an international sales meeting and factory tour. The company started making sewing needles about 140 years ago, and has been making steel needles for phonographs since 1959, and diamond tipped styli since 1964.
Due to their location on the west coast of Japan far from major cities, and the fact that they get snowed in every winter, they have had to be self reliant, and so have designed, fabricated, and repaired all their production facilities and required equipment such as custom jigs.
They produce about 120,000 styli annually, and every one is hand assembled and tested before being dispatched to distributors worldwide where they are packaged and rebranded such as by Soundring in Australia.
The Jico factory is a collection of old individual buildings that look least likely to house a high technology manufacturing organisation. But they are interconnected with walkways that link them into a maze of rooms with a range of impressive industrial manufacturing equipment. At times during the winter snow banks up to a metre alongside the walkways.
The production process for a typical moving magnet stylus has many steps.
 1. Our first stop is a room with injection moulding machines where beads of coloured plastic are placed into a hopper, then heated and forced into a mould. There are hundreds of moulds corresponding to the exact shape of the plastic grip or knob of each different type of stylus assembly. In this process a metal tube is fused into the plastic knob. When released from the mould it is trimmed by hand with a knife and inspected to ensure the plastic has no defects. In this same room are ovens where granules of various grades of rubber like material are baked into moulds and emerge as tiny donuts which become the damping or suspension of each stylus. There are dozens of models which differ in their damping properties as well as size and colour.
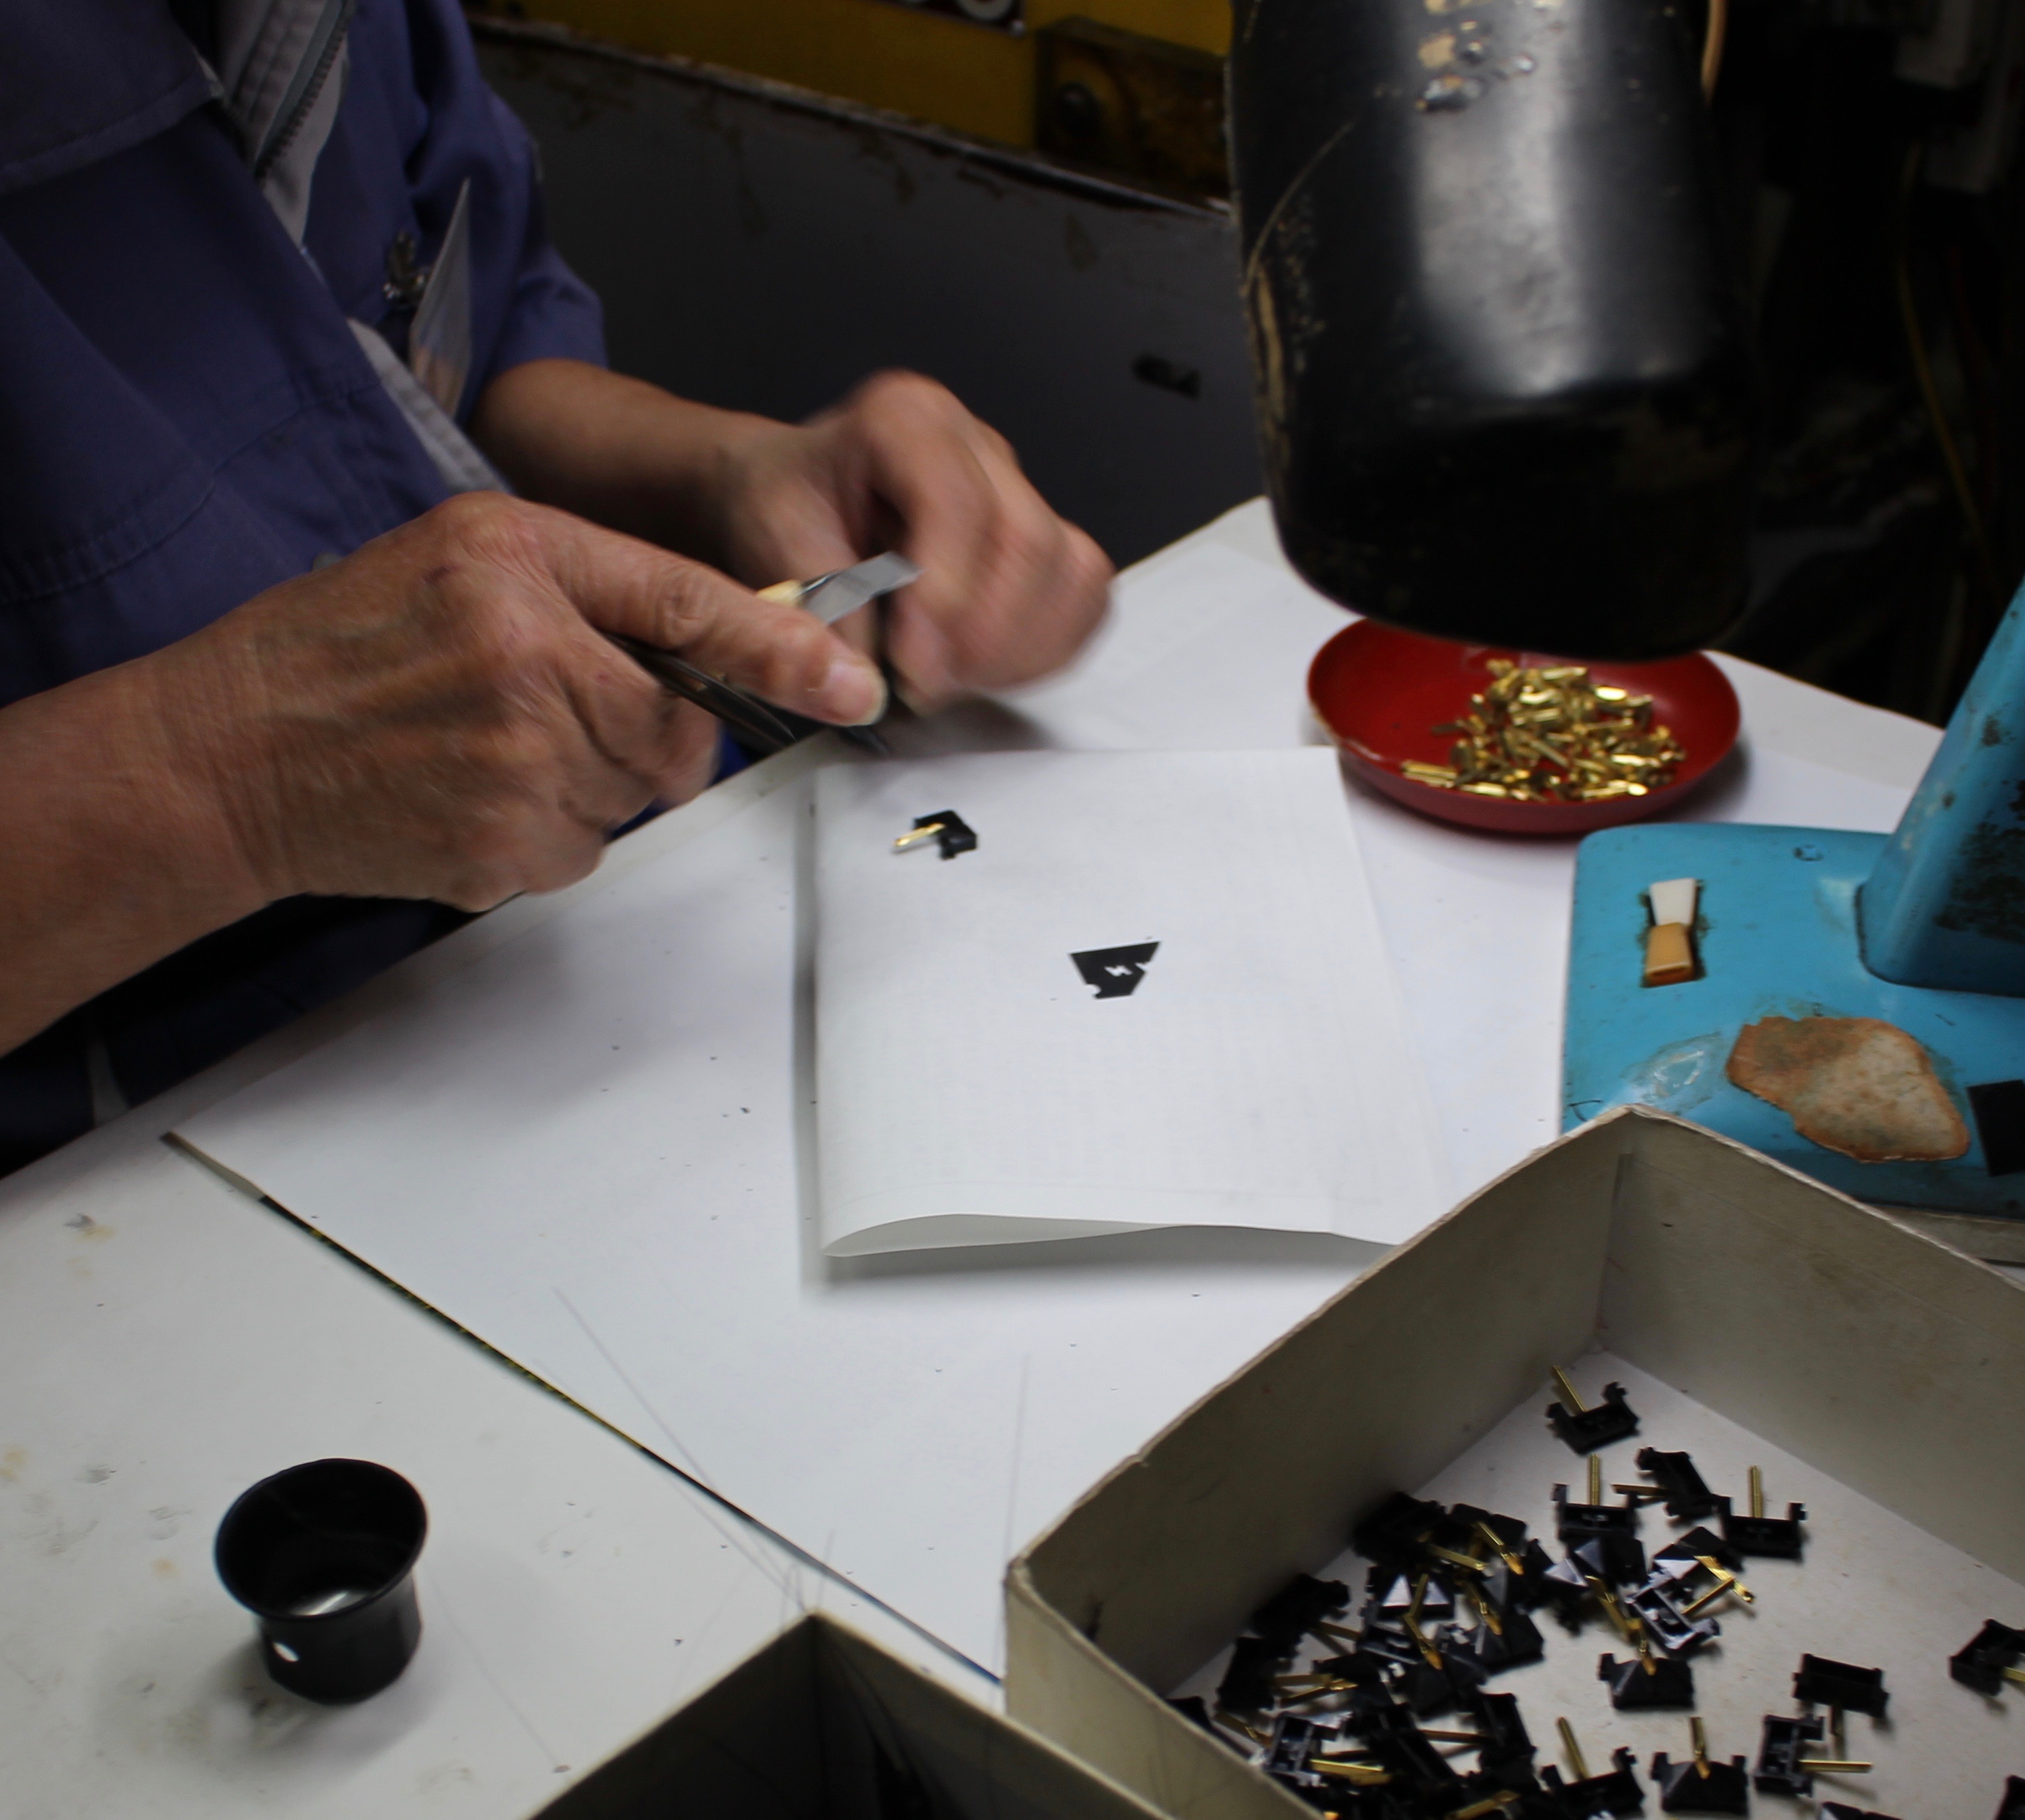
 2. In the main stylus manufacturing room we see a lady taking bundles of thin aluminium hollow rods and feeding them through a jig, where they are cut to length by a hand operated knife used in a sawing motion. The rods are .91mm thick with a central hole of .67mm, and the length is precisely set with a micrometer. This jig, like all the equipment used in the manufacturing process, has been designed and built in-house.
 3. Next, each individual cut rod, is placed in a jig which crushes one end and drills a tiny hole in it. At this stage it becomes a cantilever.
 4. The next operator places the cantilever into a holder, then inserts a tiny diamond tip into the base of a vertical tube. By pulling a lever the diamond tip is pushed into the tiny hole. She removes the cantilever and, using an eyepiece, checks that the diamond is correctly oriented in the hole. In the case of an elliptical diamond tip the diamond must be perfectly at right angles to the cantilever.
5. The next step is to apply a tiny drop of adhesive to the top of the diamond tip’s shaft to bond it firmly to the cantilever.
 6. The cantilever then has a slug of iron inserted in the other end. It is not yet a magnet, but will be magnetised at a later stage.
 7. The next operator has a batch of the appropriate knobs. She takes a damping “donut” places it over the cantilever, then inserts it into the metal tube. Once again it is inspected to ensure the diamond is vertical when the knob is held horizontally
8. The batch of assembled stylus assemblies now goes to a machine and each individual cantilever is magnetised by exposing it to a large electromagnet.
 9. Next, the stylus assemblies go to the quality control station, where first they are inspected under a binocular microscope, and then plugged into the appropriate cartridge body on a turntable’s headshell and tested for frequency range, tracking ability, and sound quality. Any units rejected are not wasted but get put back into the manufacturing process to be rebuilt.
10. Finally the styli are placed into foam trays for shipping to the distributors.
11. At a distributor the individual styli are put into their retail packaging and dispatched to record stores and hi fi dealers for sale to end users.
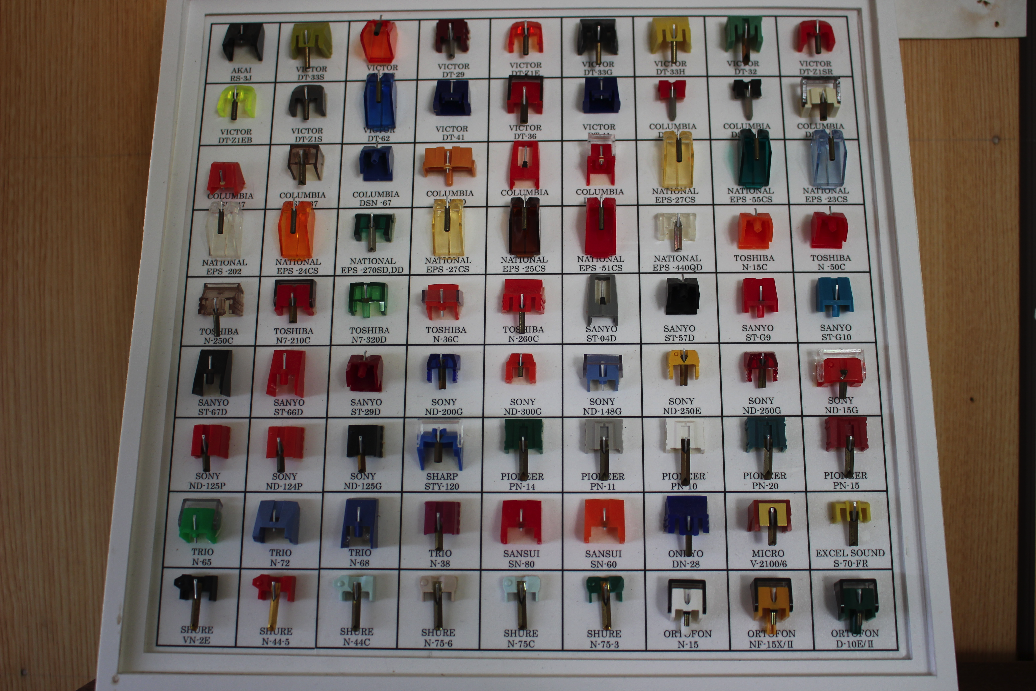 It was impressive to see way this manufacturing process has been developed, and jigs and machines built to make each stage as accurate and efficient as possible. The expertise developed in manufacturing a wide range (over 2200) of replacement styli also lead to other products. In particular they produce diamond tipped drills for dentists, jewellers etc. They make diamond tipped shafts which are used in measuring instruments and other applications where dimensions and resistance to wear are critical. They also developed a secret process where they are able to deposit tiny chips of diamond on the surface of small metal rods with different shaped ends. These get used in industrial grinding applications.
There are three short videos which show the Hamasaka location, the stylus production process, and an interview with the master technician who produces the advanced Super Analogue Styli. Well worth viewing.